

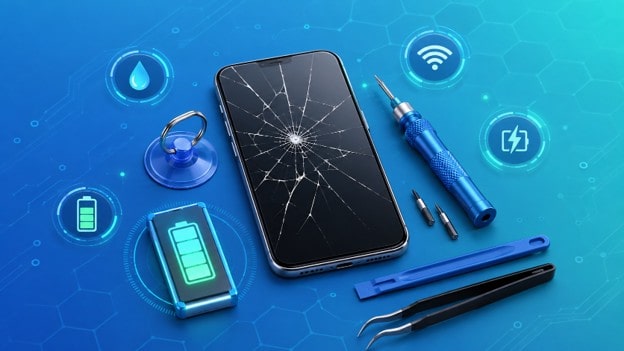

Your phone is basically your wallet, camera, office, and lifeline to everyone you know — so when it starts acting up, it’s more than an inconvenience. A cracked screen, a battery that dies by lunchtime, or a charging port that suddenly stops cooperating can throw off your whole day. For most people, the first instinct is to panic and book the nearest repair appointment, but that isn’t always necessary.
The good news? Not every phone problem needs a trip to a repair shop. With a bit of patience, a few basic supplies, and a clear set of steps, you can solve many of the most common issues yourself — and know exactly when it’s time to call in a professional instead. This guide walks through the five problems people run into most often, why they happen, and how to handle each one safely at home.
Cracked or Shattered Screen
A cracked screen is the classic phone injury, and how you handle it depends on how bad the damage is. Power off the phone before doing anything else, since this prevents further damage from pressure on the display and reduces the risk of a short circuit if the crack has reached the internal layers.
For hairline cracks, applying a tempered glass screen protector can stop the crack from spreading and keep your fingers safe from sharp edges while you decide on a more permanent fix.
If the crack runs deeper but the touchscreen still responds normally, a screen replacement kit matched to your exact model can work well. These kits, along with a basic set of Phone Repair tools like suction cups, spudgers, and precision screwdrivers, cover most of what you’ll need for a screen swap.
Watch a trusted tutorial closely and go slowly, since one misaligned connector or a torn ribbon cable can turn a simple fix into a much bigger problem. Working on a clean, well-lit surface and keeping track of every screw with a labeled tray also makes reassembly far easier.
If the display is unresponsive, flickering, showing colored lines, or leaking liquid crystal, stop the DIY attempt right there — that usually points to internal damage a repair kit won’t fix. Similarly, if touch stops working altogether, colors look distorted, or the crack crosses the camera or speaker area, it’s time to call a professional rather than risk making the damage worse.

Battery Draining Way Too Fast
If you’re charging your phone twice a day just to keep up, something is quietly draining it in the background, and it’s usually fixable without any tools at all. Start by opening your battery settings and checking which apps are using the most power, since social media, streaming, and navigation apps are usually the biggest culprits. Apps that were left running with location tracking or auto-refresh enabled can drain a battery far faster than normal daily use.
Turn off background app refresh, auto-sync, and location access for anything you don’t use constantly, and switch to adaptive or lower screen brightness with a shorter screen timeout.
These small settings changes often make a noticeable difference within a day. Keeping your apps and operating system updated also helps, since outdated software often runs less efficiently and can conflict with newer hardware optimizations.
If your phone is over two years old and still drains fast after all of this, the battery itself has likely degraded and needs replacing. Lithium-ion batteries naturally lose capacity over hundreds of charge cycles, and no amount of settings tweaking will restore that lost capacity. Some phones allow a straightforward battery swap with basic tools, while others are sealed more tightly and are better left to someone experienced.

Phone Overheating During Normal Use
A warm phone after a long video call or a round of gaming is completely normal — a phone that’s hot to the touch while sitting idle is not, and it’s worth addressing quickly since prolonged overheating can shorten the lifespan of the battery and other internal components. Remove the case immediately to let heat escape, since many cases trap warmth against the back of the device and slow down cooling.
Close every app running in the background, not just the one you’re actively using, since several apps competing for processing power at once is one of the most common causes of overheating. Move the phone out of direct sunlight or off a hot surface like a car dashboard or a pillow, both of which restrict airflow around the device. Running a scan with a reputable security app can also help rule out malware quietly overworking your processor in the background, which is more common than most people realize.
A simple restart helps clear out any stuck background processes and often resolves overheating that appears out of nowhere. If overheating keeps happening even during light use, such as texting or browsing, it’s often a sign of battery wear, a faulty charging cable, or a hardware fault rather than something settings alone can fix, and it’s worth getting it looked at before the issue gets worse.
Water-Damaged Phone
Speed matters more than anything else here, and how you react in the first few minutes can determine whether your phone survives. Power the phone off immediately, and don’t press buttons to “check” if it still works, since powering it on while wet is one of the fastest ways to cause a short circuit. Remove the case, SIM card, and memory card as soon as possible, then dry the exterior with a soft, absorbent cloth.
Place the phone in a container of silica gel packets, which work far more effectively than the commonly recommended bowl of rice, for at least 24 hours. Silica gel absorbs moisture more consistently and doesn’t leave dust or grains behind in the ports. Skip the hair dryer no matter how tempting it is, since heat can warp internal components and can actually push moisture deeper inside the device instead of drawing it out.
After 24 hours, power it on and see what happens. If it starts up normally, keep an eye on it over the next few days for any lingering issues like a distorted speaker or a sticky button. If it doesn’t start, or the screen shows discoloration, dead pixels, or won’t charge, professional repair is the safer next step, since a technician can open the device and clean corrosion from the internal components before it spreads further.
Phone Not Charging
Before assuming the worst, work through the simple causes first, since a “dead” phone is often just a loose connection or a worn-out cable. Swap the cable and adapter for ones you know work with another device, since cheap or damaged cables are one of the most common reasons a phone won’t charge at all. Inspect the charging port for lint or dust, since pocket debris builds up over time and blocks the connection, and clear it gently with a toothpick or a short burst of compressed air rather than anything metal that could damage the pins.
Restart the phone, since a frozen charging process can sometimes be fixed with a simple reboot, and test wireless charging if your phone supports it to check whether the issue is specific to the port itself. If the phone charges wirelessly but not through the cable, that narrows the problem down considerably and points toward the port or cable rather than the battery.
If none of these steps work, the charging port may need replacing, which involves delicate soldering work and is best left to someone experienced with the right equipment. Attempting this without the proper tools risks damaging the logic board underneath, which turns a simple repair into a far more expensive one.
Knowing When to DIY and When to Call a Professional
Most everyday Phone Repair Common Issues fall into these five categories, and recognizing them early means you can act fast, whether that’s a five-minute fix at home or catching the signs that point to something more serious.
Learning to spot the difference between a minor glitch and a sign of deeper hardware trouble is one of the most useful skills any phone owner can pick up, since it saves both time and unnecessary spending on parts you may not actually need.
DIY repairs are great for saving money on minor issues, but they do carry risk, since one wrong move on a screen replacement or a battery swap can turn a small problem into an expensive one. Cheap replacement parts, in particular, can cause more harm than good if they’re poorly manufactured or don’t fit your model correctly.
If you’ve tried these fixes and the issue persists, it’s worth getting a second opinion from a technician who can diagnose the problem properly rather than guessing.
A quick professional check often costs less than a damaged part you’ll need to replace twice, and it can catch underlying issues like a swelling battery or corroded connector before they turn into safety hazards.
Treat DIY fixes as your first line of defense, and professional repair as the backup plan when the problem goes deeper than settings and simple tools can reach.
Final Thoughts
Phones break in fairly predictable ways, and most of the problems people run into cracked screens, fast-draining batteries, overheating, water exposure, and charging failures can be handled at home with a little patience and the right approach. The key is knowing where the line sits between a simple fix and a job that needs a trained technician, since pushing a DIY repair too far can end up costing more than the original problem ever would have.
Keep a small kit of basic tools on hand, stay calm the moment something goes wrong, and work through the steps methodically rather than rushing. Doing that will not only save you money over time but also extend the life of your device well beyond what most people expect. And whenever a fix feels out of your depth, there’s no shame in handing it over to someone who does this for a living — it’s often the fastest way back to a phone that works exactly the way it should.