

Recording phone calls on an iPhone can feel like a tricky task, especially since Apple doesn’t include a built-in feature for it. While third-party apps are one solution, many users either don’t want to download extra apps or are concerned about privacy, costs, or compatibility issues. Thankfully, there are other effective methods you can use to record a phone call on your iPhone, completely without relying on an app.
If you’d also like to explore more helpful tech tutorials and solutions, check out this in-depth resource on mobile technology tips.
In this comprehensive guide, we’ll walk you through several ways to record calls using different methods, including using another device, a third-party website, and even your voicemail. Each method is explained step-by-step to help you choose what works best for your needs. But before you proceed, it’s extremely important to understand the legal aspect of recording calls.
Important Legal Notice Before Recording a Call
Before recording any phone conversation, always make sure you’re not violating any recording laws. In many countries and states, it’s illegal to record a phone call unless all participants give their consent. Some regions only require one-party consent, while others mandate that everyone involved must agree to being recorded. To avoid legal consequences, research the laws of your country or state, and inform the other person when necessary. Never assume it’s allowed—check first.
You may also find it helpful to understand the differences in call-recording capabilities between iPhone and Android, especially since Apple restricts built-in recording features compared to some Android models.
Method 1: Use Your Voicemail to Record a Call
Some iPhone users can record calls using the voicemail system built into their carrier’s service. While not every provider supports this feature, it’s a helpful trick if available.
Step-by-Step Guide to Recording with Voicemail
- Confirm your voicemail is properly set up
Make sure:
- You’re running iOS 9.0 or later
- Voicemail is already configured on your iPhone
- Call waiting is turned off (go to Settings > Phone > Call Waiting to disable it)


- Start the phone call
Dial the number of the person you wish to speak with and wait for them to answer.
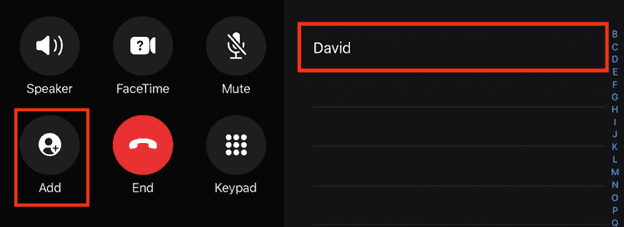
- Add your own number to the call
Once the call is active, tap the “+” icon and select your own phone number to initiate a second call to your voicemail.
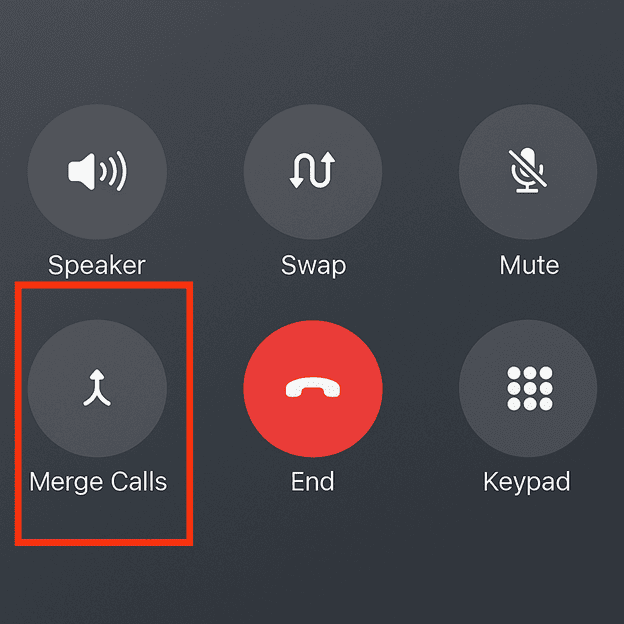
- Merge both calls
After your voicemail picks up, tap “Merge Calls.” This will combine the current conversation with your voicemail line.
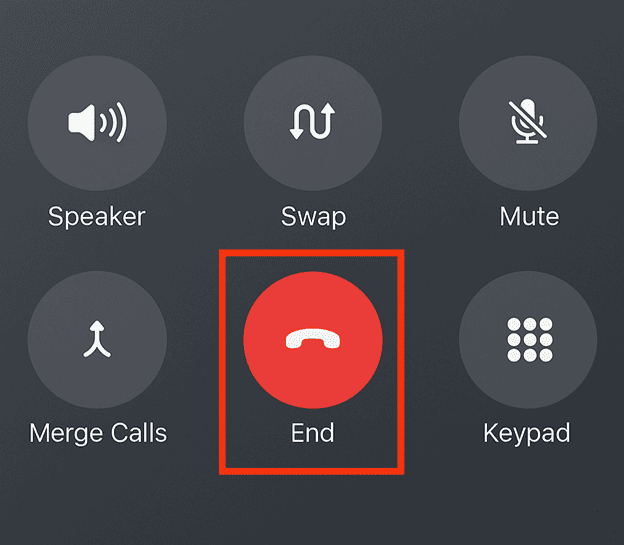
- Complete the call
When you hang up, the entire conversation will be saved in your voicemail inbox. You can later listen to the message, save it, or forward it to another device.
Method 2: Record Using a Website Without Conference Calling
If your iPhone plan doesn’t support conference calls, or you’d rather not deal with merging calls manually, Recordator also offers a “dial-to-call” option. This is useful if you want the service to do most of the work for you.
Steps for the Dial-to-Call Method
- Sign in to your Recordator account
Log in on your browser and head to the call dashboard.
- Start a new call session
Click on “New Call” inside your account area. You’ll need to provide the contact information of the person you want to call.
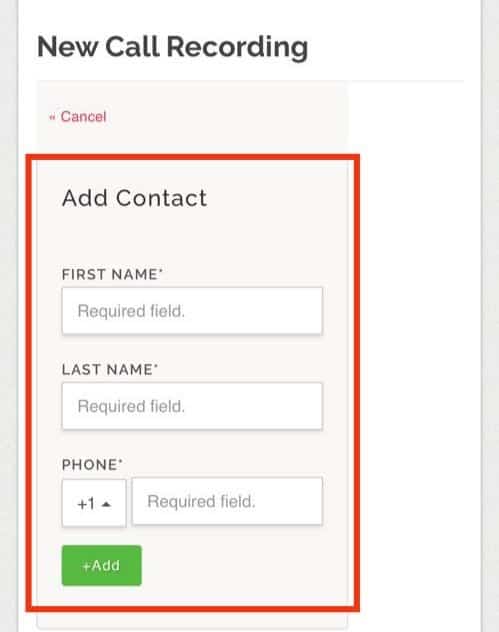
- Add the contact information
Input the person’s name and phone number. Then press the green “+Add” button to confirm the details.
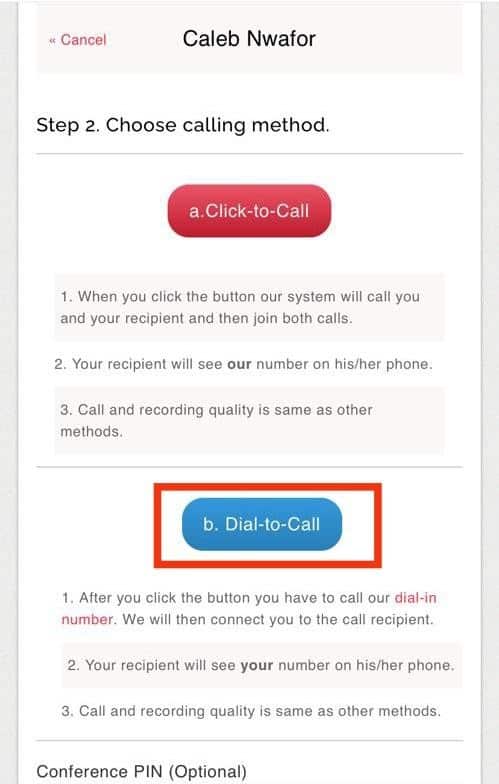
- Use the Dial-to-Call button
Click on the blue “Dial-to-Call” button. The website will initiate the call and provide instructions on what to do next.
- Call the designated number from your phone
Dial the provided number from your iPhone. Once connected, Recordator will link you to the recipient and start recording the conversation.
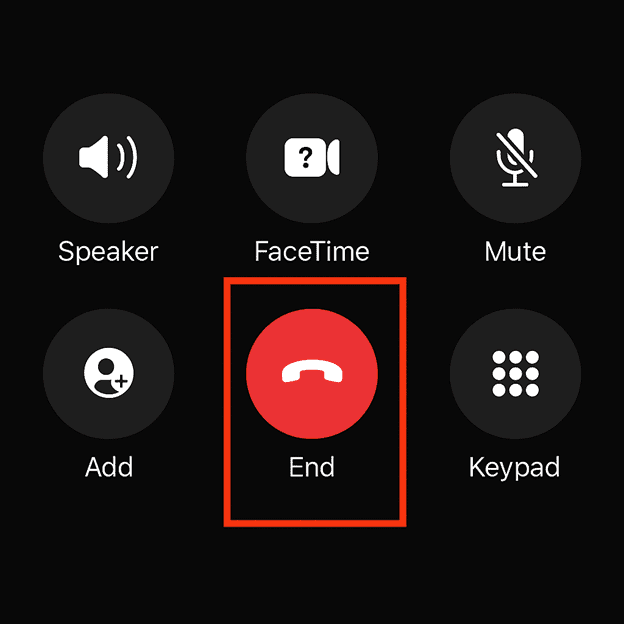
- End the call when finished
Once the call is complete, just hang up. Your recording will be available on Recordator’s website in your “My Recordings” section.

Method 3: Record Calls via a Conference Call Using a Third-Party Website
If you prefer a digital solution but still want to avoid installing an app, you can use a website like Recordator.com. This site offers call recording services through a process known as the “merge-and-record” method. You’ll essentially be setting up a three-way call: you, the person you’re calling, and the recording service.
How to Use Recordator with Conference Calling
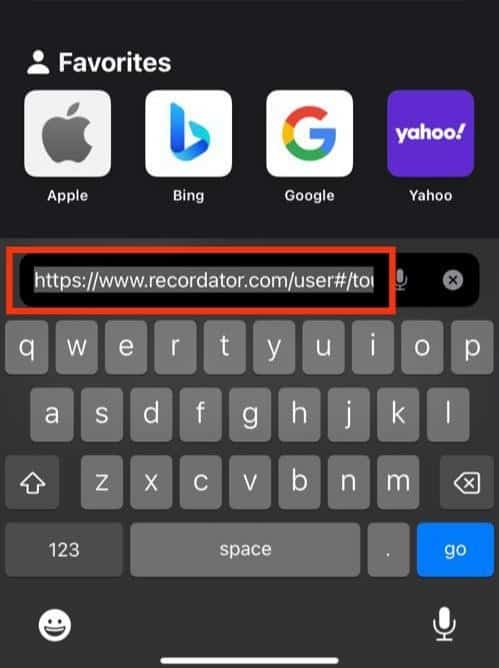
- Sign up on Recordator.com
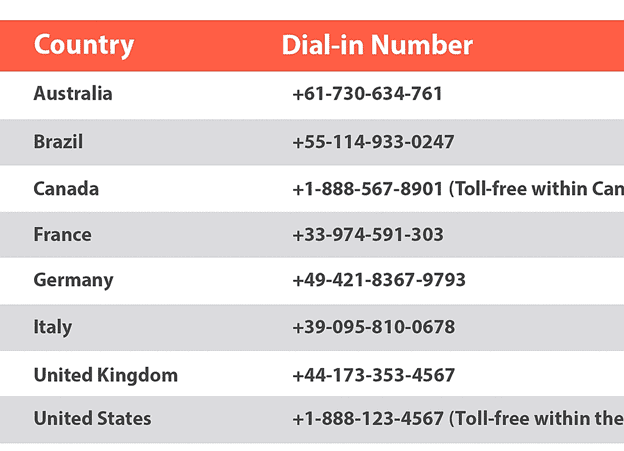
Visit the website and create an account. While there’s a free trial, be aware that full access is paid, so you may need to purchase additional minutes after your trial runs out. - Please dial the access number that corresponds to your country.
For example, if you’re calling from within the United States, you would normally use a local contact number. However, for this version, use +44-20-7946-0991 (United Kingdom) as an alternative reference. - Add your contact to the call
Once connected to the access number, tap the “+” icon on your iPhone’s call screen and select the person you want to call from your contacts. - Click the “merge calls“
As explained by Recordator, this approach is commonly known as the “merge-and-record” technique. It works by initiating a three-way conference call that includes Recordator in the conversation. This setup allows the service to record the call seamlessly without interrupting your ongoing conversation. - End the call to save the recording
When the call is finished, simply hang up. Your recording will be saved automatically to your account, and you can download it later in MP3 format.
Method 4: Record a Call Using Another Device
One of the easiest and most accessible methods to record a phone call is to use a second device that has a microphone and a voice recording function. This could be another smartphone, a tablet, a laptop, or a voice recorder. This method is simple and doesn’t require any additional software installation on your iPhone.
Step-by-Step Instructions
- Get a second device ready
Make sure the second device you’re using has a built-in microphone and an audio recording app. This could be the built-in Voice Memos app on an iPhone, the Sound Recorder on Android, or a digital audio recorder.
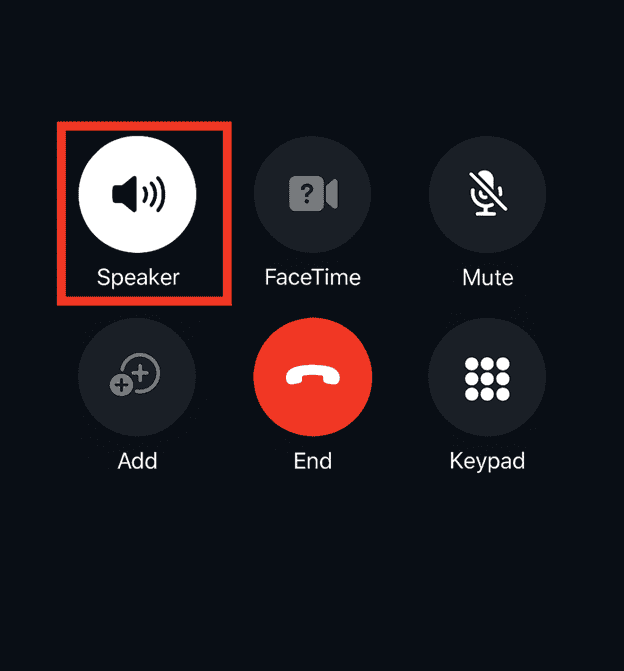
- Make the phone call on speaker
Dial the number and immediately put the call on speakerphone so both voices are loud and clear. This will allow the second device to capture everything that’s said on the call.
- Place your iPhone near the recording device
To get the best quality recording, position your iPhone as close as possible to the second device’s microphone. Make sure there’s minimal background noise.
If you find your Wi-Fi or audio signal dropping when you place the call on speaker, see our post on Why Your Wi‑Fi Keeps Disconnecting for quick fixes.

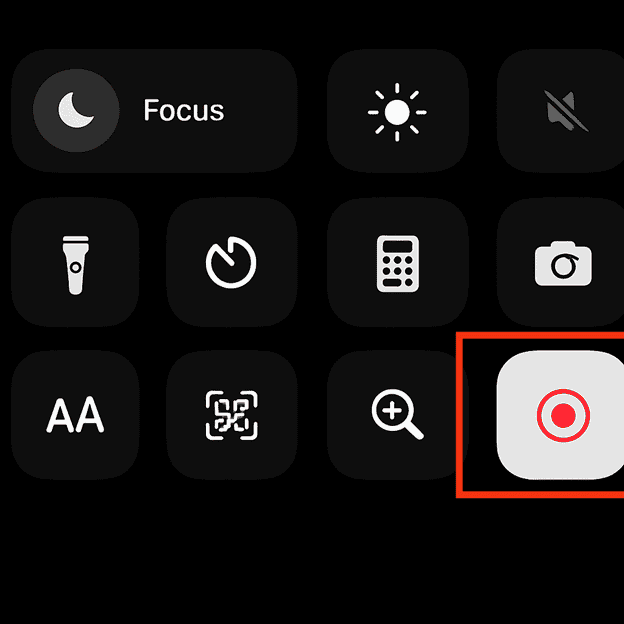
- Start recording
Begin recording before the main conversation starts to ensure you don’t miss anything. Confirm the recording device is working correctly. - End and save the recording
When the call is finished, stop the recording and save it. You can transfer the file to your primary device or keep it stored on the second device for future reference.
How to Listen Back, Save, and Share Your iPhone Call Recordings
After you’ve gone through and completed the process of recording your phone calls—whether that was by using your phone’s built-in recording option, connecting an external recording device, or relying on a third-party recording service—the next important step begins, and it’s one that deserves just as much attention: accessing those recordings, saving them safely, and sharing them when needed. These audio files might be recorded for a number of valid reasons, such as preserving meaningful conversations for personal reference, documenting important work-related interviews, keeping a record of business meetings, or holding on to audio logs for legal or customer service purposes. No matter the reason behind recording your calls, it’s essential that you know how to properly manage and organize them in a way that ensures they’re easy to find, protected from accidental loss, and ready to be used when necessary. This includes knowing where each recording is stored, giving them clear and descriptive filenames, backing them up—either to cloud storage or a secure offline location—and sharing them in a safe, controlled way whenever required. In the guide below, you’ll find step-by-step instructions to help you do all of this effectively, depending on the recording method you used:
1. If You Used Voicemail
- Start by opening the Phone app on your iPhone, then head over to the bottom of the screen and tap on the Voicemail tab to access your saved voice messages.
- Simply tap on the particular recording you want to listen to, and the audio will immediately begin to play it back.
- After selecting the voicemail you wish to share, tap the Share button that appears with the available options, then choose how you’d like to send the file—whether through AirDrop, WhatsApp, iMessage, or Mail—or if you prefer, you can store a copy by saving it directly to Files or Voice Memos.”
Tips: If you’re looking to keep your voicemails safe and accessible for the long term, it’s a smart move to save them to your iCloud Drive or even transfer them to an external storage device, such as a USB drive or hard disk, to ensure you always have a backup in case something happens to your phone.
2. If You Used Recordator
- Go ahead and sign in to your existing account on Recordator.com by entering your login details, so you can access the features and recordings associated with your profile.
- Navigate to the section labeled ‘My Recordings’ within your dashboard, where all of your saved audio files and previous call recordings are organized and readily accessible for you to review or manage.
- Locate the three vertical dots (•••) next to any of your saved recordings, click on them to bring up a list of available actions, and then select one of the following options:
- Play to listen online.
- Download to save it as an MP3 file.
- Share to generate a private URL you can send to others.
Note: All of your recorded files will remain safely stored in your account by default, unless you choose to manually delete them yourself. For that reason, it’s a good idea to regularly keep an eye on your storage usage to make sure you’re not running out of space.
3. If You Used Another Device (External Recorder or Second Phone)
- On the second device you have available, locate and open the built-in voice recording feature or any audio recording tool, so you can begin capturing the conversation or sound you want to save.
- Once you’ve saved the recording, go ahead and rename the file to something more descriptive—like for example, (‘Call with John – July 10’)so that it’s easier for you to recognize and locate later when you need it.”
- Use Bluetooth, USB cable, cloud storage (like Google Drive or iCloud), or a file transfer app to move the recording to your iPhone or computer.
- After you’ve successfully moved the file to your preferred location, you’ll have the flexibility to do a number of things with it—such as sharing it with others, converting the audio into written text through transcription, or creating a backup to ensure it’s safely stored and can be accessed later if needed.
Tip: if your phone is running low on storage after saving multiple recordings, our guide on How to Clear System Data on iPhone can help you free up space quickly.
Common Questions or FAQs
1. How can I record calls on my iPhone without installing any app?
Recording phone calls on an iPhone without using any third-party app may sound difficult, but there are some smart and practical ways to do it. One method involves using your carrier’s voicemail service. Here’s how: While on a call, you can add your own number as a third participant to the conversation, then tap the “merge calls” button. This will send the call to your voicemail inbox, where it gets recorded just like a regular message. After the call ends, you can go to your Voicemail tab in the Phone app and play back or share the recording.
Another method is to simply put the iPhone on speakerphone and use another device—like a second phone, a tablet, or even a digital voice recorder—to record the conversation. It’s basic, but it works well when done in a quiet environment. These approaches don’t require any app downloads, but always make sure to check your local laws before recording any call.
2. Can I use the Voice Memos app on my iPhone to record a phone conversation?
The Voice Memos app cannot directly record phone calls because iOS doesn’t allow apps to access the microphone during a call for privacy reasons. However, there’s a smart workaround. You can use speaker mode during the call, then open the Voice Memos app on another Apple device nearby—like an iPad, iPod Touch, or even another iPhone—to record the audio. The voice quality depends on your environment, so be sure to speak clearly and avoid noisy backgrounds.
After recording, the memo is saved and can be renamed, trimmed, or shared via iMessage, AirDrop, email, or cloud storage. This method is simple, doesn’t require any new app installation, and works well for people who already own more than one Apple device.
3. What manual methods can I use to record calls on my iPhone without relying on any software?
If you’re trying to record a call on your iPhone without downloading any software, you have a few creative options. One common method is to use the merge-call trick, where you start a call, then add your own voicemail number or a recording line as a third participant, and merge the calls. This saves the call to your voicemail inbox, which you can access later.
Alternatively, you can simply place the phone on speaker mode and record the conversation using another device, like an Android phone, another iPhone, or even a laptop. This might seem old-school, but it can be very effective if you just need a backup of your conversation.
Just be mindful of sound quality and battery life. Keep your devices charged, and test the volume and clarity before starting your actual recording.
4. Is it legal to record phone calls on an iPhone without notifying the other person?
The legality of recording calls depends entirely on the laws in your country or state. In some places—like many states in the U.S., Nigeria, and the UK—only one-party consent is required. That means you can record the call as long as you are one of the participants. However, in two-party consent regions like California, all parties involved in the conversation must give permission.
If you’re not sure what your local laws say, it’s always best to play it safe: either inform the other person at the beginning of the call or do a quick search to confirm whether recording without consent is allowed in your area. Violating consent laws can result in serious legal consequences, even if your intentions were harmless.
5. After recording a call, how can I save it and make sure I don’t lose the file?
Once you’ve successfully recorded a phone call—whether using voicemail, a second device, or a manual method—it’s important to save the file in a secure location so you don’t lose it. If it’s a voicemail recording, go to the Phone app > Voicemail tab, tap the message, and use the Share option to send it to your iCloud Drive, Google Drive, WhatsApp, or email.
For recordings made on another phone or device, transfer the file via Bluetooth, USB cable, or cloud storage. You can even upload it to your Google account or back it up on an external hard drive. Organize your recordings by naming them with the call date or topic, so you can find them easily later.
Remember: iPhone storage can fill up fast, so it’s a good idea to clear out old recordings you no longer need and keep only the important ones backed up in the cloud or on a memory card.


