


Professional video editing does not have to be hard. This appears to be the thinking behind Filmora Pro, a new video editing software from Wondershare Technology, makers of the Filmora Video Editor. In this review, we will be taking a closer look at the Filmora Pro.
The standard Filmora video editing software is powerful as it is, but the Filmora Pro is coming with more tools and features that put more control in the hands of creatives for limitless possibilities and high productivity.
Filmora Pro is targeted at YouTubers, Film makers, and people who feel they have outgrown features available in the entry-level Filmora Video Editor, which is already very popular among beginner video editors and Youtubers.
Filmora Pro has been discontinued as Wondershare is now offering a lot of the features on the Pro edition in the latest iteration of the Filmora standard editing Software. See latest prices.
Highlight Features of Filmora Pro
Filmora Pro is fully loaded with lots of advanced features. Here are some of the highlight features:
Unlimited Tracks
The latest Filmora video editor, the Filmora 9, is limited to 100 tracks, this meant you had only 100 tracks for adding different content components for your video editing which might not be enough for some complex projects.
With Filmora Pro, you get unlimited tracks, meaning you can add all you want to add to your video for an amazing production. No need to be conservative, because you are trying to keep to the limit. Filmora Pro allows your creativity to explode.

Grouping Timeline Clips
With Filmora Pro you can put labels on clips. This simple feature enables you group clips on your timeline as you can select apply the same editing on all clips that you have given a particular label.
This can make editing fast as you do not need to individually apply the same editing to each clip, you can simply group all the clips to one label and edit once.
Use only Video or Audio
Filmora Pro allows you to choose whether you want just the audio or video in a clip. Of course, you can achieve the same result in the standard Filmora video editing software, but it is more complicated and less efficient.
In standard Filmora, you reduce the volume of the audio to zero, if you do not want the audio or you place another video clip above a video you don’t want.

The Filmora Pro handles this more elegantly, just click Use Audio or Use Video and the unwanted component will be discarded.
Range Markers
Filmora Pro allows you to easily mark out the part of a clip you want to add to your project. Just select the start point and end point and then drag the selected part of the clip to a track for further editing.
Advanced Editing Modes
Flimora Pro offers a couple of advanced video editing modes. You have the Slip Tool, the Slide Tool, the Ripple Edit Tool, and the Roll Edit tool.
Advanced Audio Editing
Filmora Pro also offers loads of advanced audio editing. You can automatically sync audio in clips. It also makes easier to remove unwanted noise from the audio.
Professional Color Correction
Filmora Pro comes with advanced colour tuning tools that enables you add more life to your clip. You get color wheels, scopes, and controls for highlights, midtones, and shadows. You can also use auto correction to fine-tune videos.
Filmora Pro also offers a couple of other advanced features like keyframing for motion graphics with custom animations for text and graphics and Hollywood-style visual effects.
Filmora Pro Free Download Windows and Mac
You can download Filmora Pro free online, for Windows PC and for Mac.
The free download comes with the full feature. The only limitation is that the final video will have a watermark on it. This means you tryout the full power of the video editor without having to pay a dime.
To remove the limitation (watermark), you have to buy Filmora Pro starting at a price of $89.99 for one year subscription or $149.99 one-time fee for the lifetime subscription. For latest prices and plans, Click Here.
Filmora Pro Review
Now that we have learnt about the highlights of the video editor and downloaded it, it’s now time to install and try it out.
Installing Filmora Pro is easy, just double click the downloaded file to begin the installation. Once the installation is complete, you can launch the software.
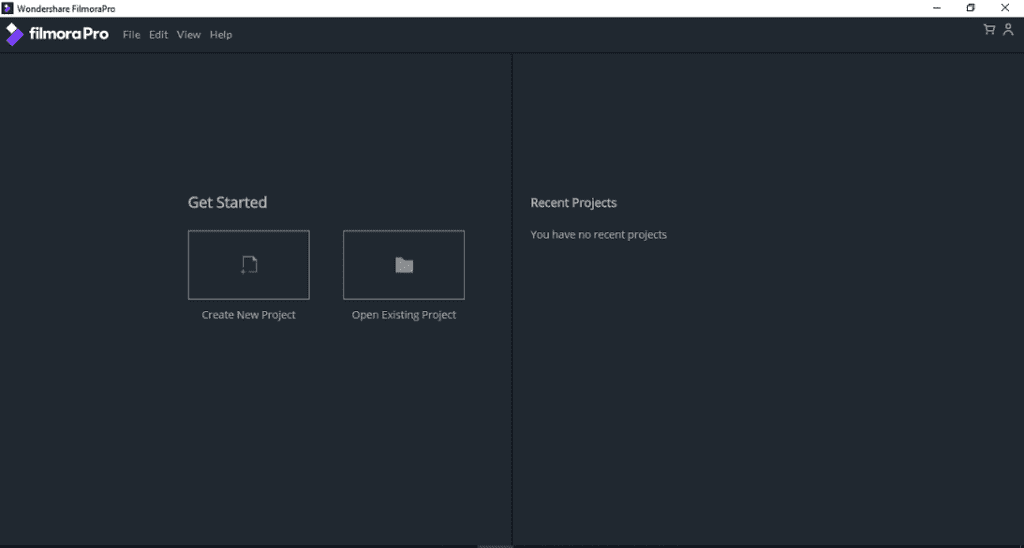
The start screen of the Filmora Pro is clean and easy to navigate. The UI is divided into two equal parts. On the left you have two icons, one for starting a fresh project and the other for opening an existing project.
On the right, you will see icons to projects you recently worked on. This is empty now because we have not worked on any project yet.
We click on the Create New Project icon to get started. This action opens the editor UI (or Workspace).
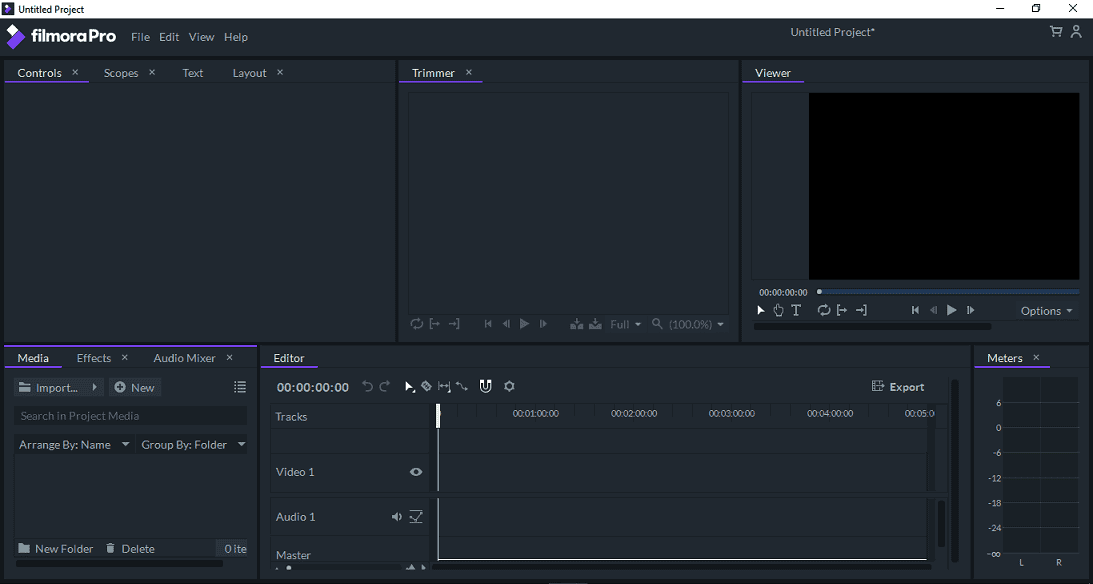
The first thing you will probably notice, especially if you are like me coming from a background in the standard Filmora video editor, is that the editor has two monitors (or views).
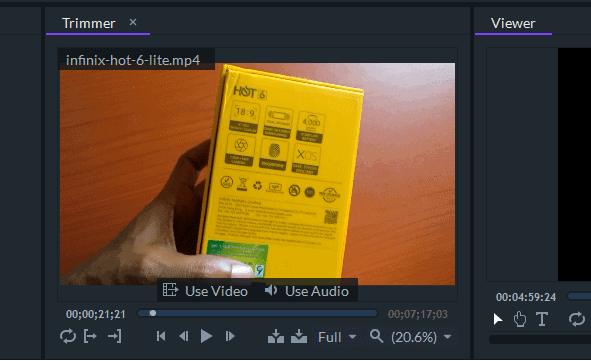
One is a trimmer, which enables you select the part of an imported video clip that you want to add to the timeline using the Range Marker tool. The trimmer also enables you select either just the audio or video from the clip.
The other monitor (view) is the viewer that enables you playback the timeline.
The Workspace is very different from Filmora 9. It is also a little bit more complicated, especially if you are a first time user of a video editing software. However, coming from a background of Filmora9, it was quite easy to figure things out in no time.
Since this software is built for people who have outgrown the simpler Filmora video editor, this will not be much of a challenge for them. However, if this is your first professional video editor, it will take a bit getting use to.
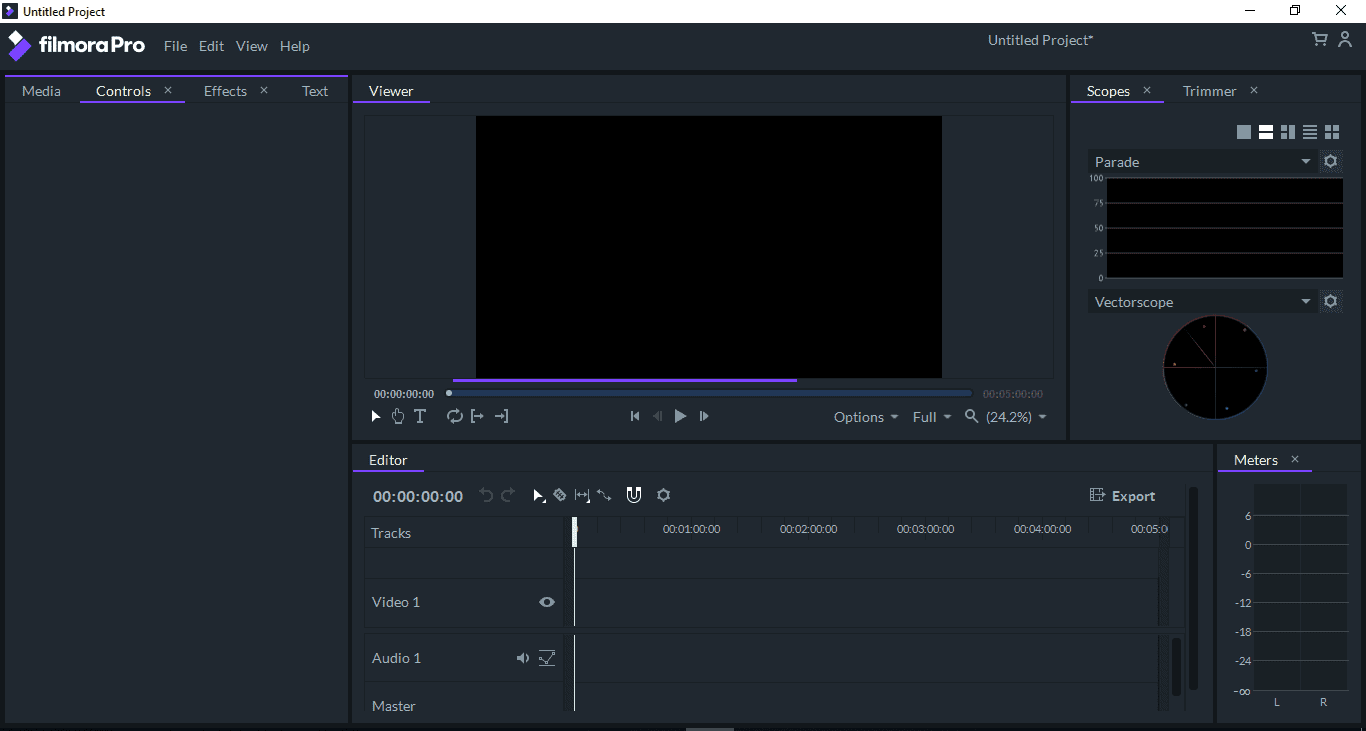
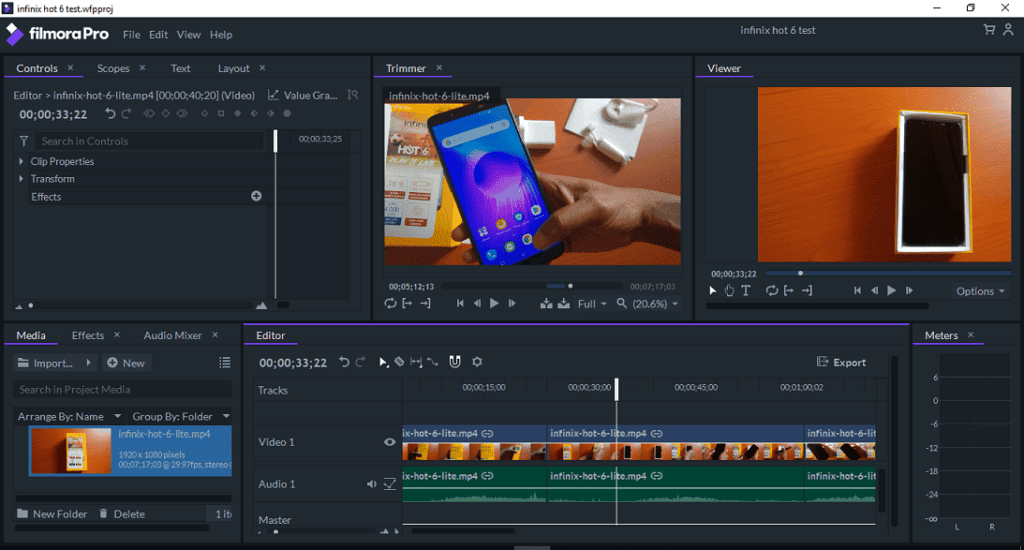
Another difference you will notice in the interface compared to Filmora9 is that the Workspace is arranged in blocks, with each block housing a couple of tabs called Panels.
For example, the block to the left of the Trimmer houses four tabs namely Controls, Scopes, Text, and Layout.
Below this block, you have another block with three panels namely Media, Effects, and Audio Mixer.
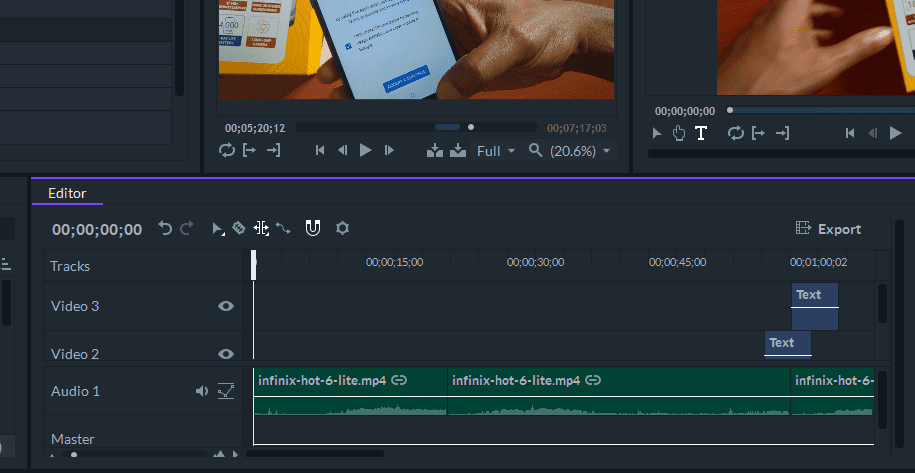
To the right of this block is a panel called Editor. The editor panel houses the timeline, which comprises of the video and audio tracks. The editor panel also houses some the very handy advanced video editing tools that comes with the Filmora Pro.
Tools found on the Editor panel include the Slip Tool, Slide Tool, Ripple Edit Tool, and Roll Edit Tool. Other tools include the Slice Tool, Selection Tool, Rate Stretch Tool, and Snapping.
A settings icon is also provided to enable you edit the video, audio, and rendering properties of the project. The Export button of the Filmora Pro is also located on the top-right end of the Editor panel.
To the right of the Editor panel is the Meters panel which offers a visual representation of the audio levels of the left and right channel. Note that the Trimmer and Viewer are also panels.
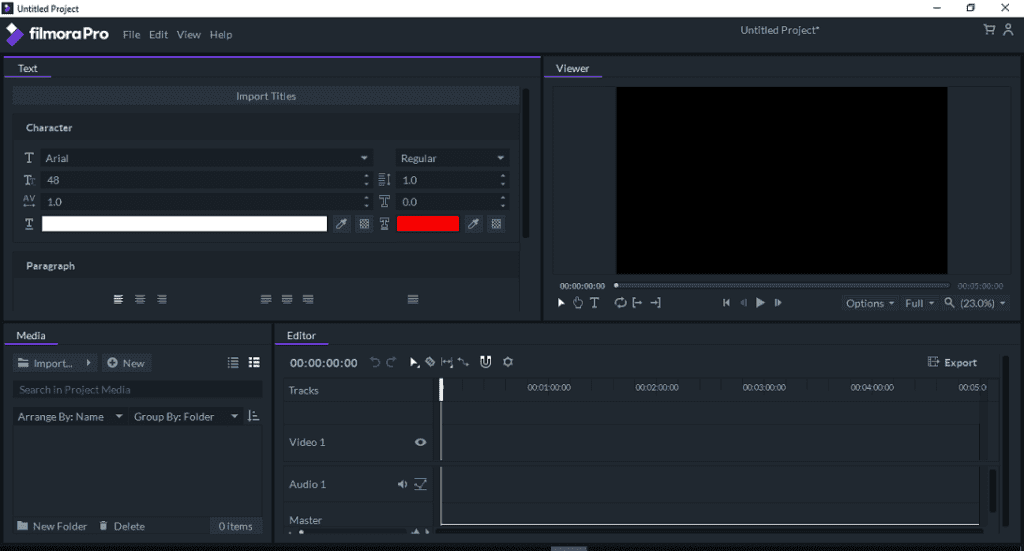
Some of the panels (including the Trimmer) can be closed (the ones with X). Just click on the X on the tab to close it.
Panels like Text, Media, Viewer and Editor cannot be closed. Below is the Workspace with all the closable tabs closed.
To display (or bring back) any panel to the Workspace click View > Panels and click on the panel you want to display.
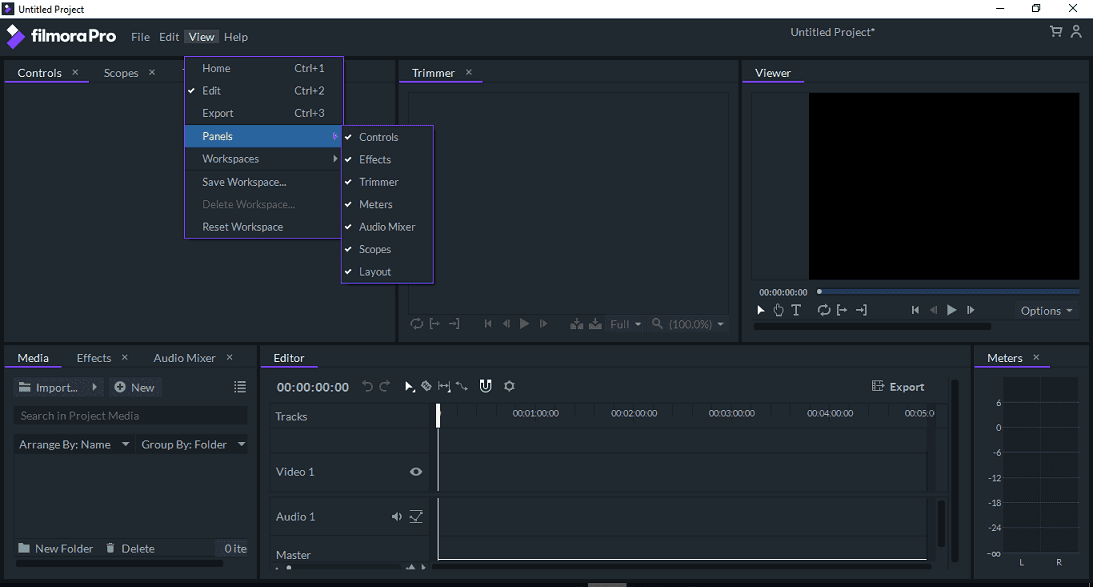
To display the default Workspace on Filmora Pro, just click View > Reset Workspace.
Notice that you can also increase or reduce the size of each panel or panel block by dragging the top, bottom, left, or right borders. That way you can allocate more real-estate to the panel(s) you consider most important to your current tasks.
Filmora Pro also offers Workspaces optimised for different tasks like Editing (default), Media, Audio, Color, Effects, and Text. To select a Workspace click View > Workspaces and select the workspace you want.
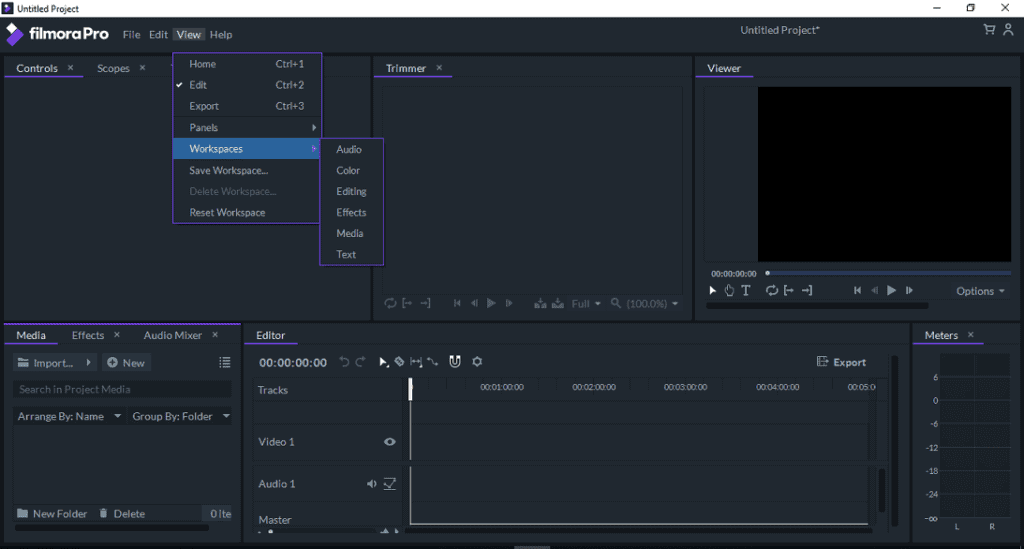
If you select a Workspace, Filmora Pro will optimise each panel for the task selected.
For example, here is how the Workspace looks if you select color.
Apart from the built-in Workspaces, you can also create your own Custom Workspaces. By tweaking and moving around each panel you might create an optimum workspace for yourself.
Filmora Pro enables you save your own custom built Workspaces, so that you can use them in future for other projects. To do this click View > Save Workspaces…
Then enter a name for the Workspace in the dialog that appears and click OK.
Now that we are a bit more familiar about editing video on Filmora Pro let us do some basic editing.
Editing with Filmora Pro
The first step to video editing and media editing with Filmora Pro is to import the content (video, audio, or both) that you want to edit. To do this, simply click on Import… on the Media panel.
You then find and add the media from the folder system of your computer.
Once you select a video it will be imported and will appear on the Trimmer panel.
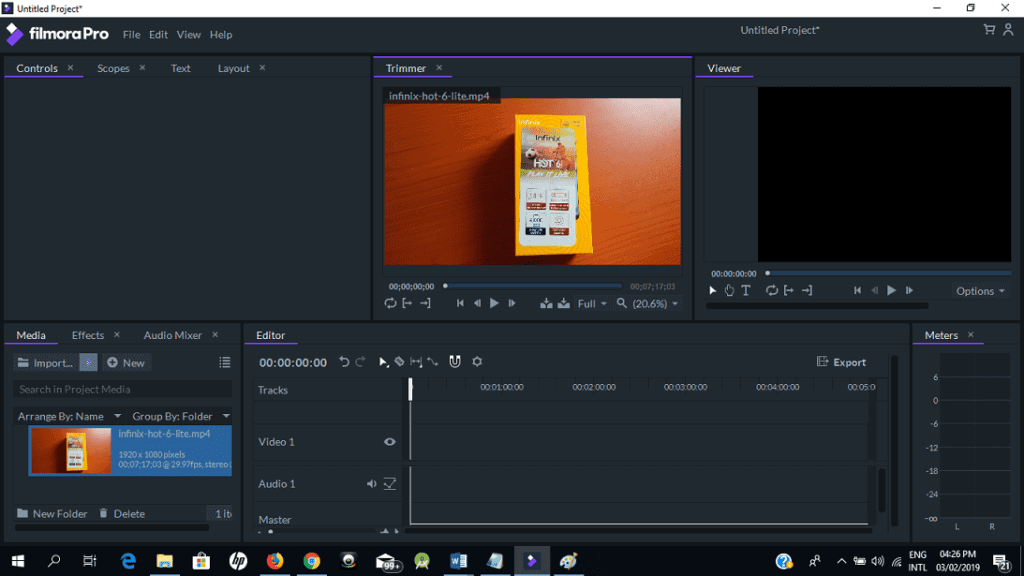
At this point you can either decide to add the video to the timeline as is using the Insert Clip icon or you can first use the Range Marker Tool to mark the portion of the video you want to use out of the imported video before inserting clip.
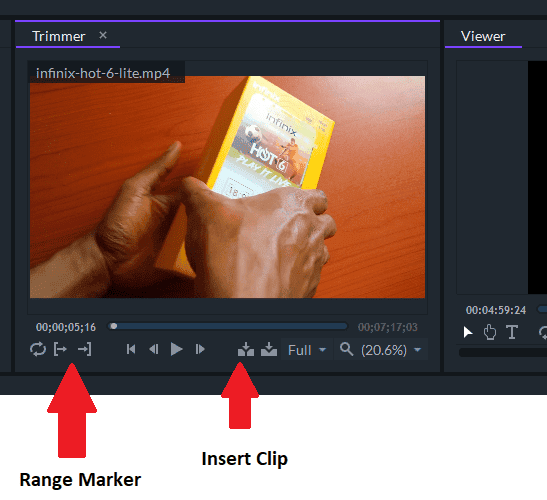
The range marker comes with two buttons for marking the start and end point of the clip you want to add to the timeline. Just play the clip and mark out the portion you want to add to the timeline.
You can mark out multiple portions of the clip to add to the timeline. After marking out each clip, click on Insert Clip icon before marking out another one.
Filmora Pro also allows you select only the audio and video component of a clip. Just point on the Trimmer view and Use Audio or Use Video buttons will appear. Click one and drag to appropriate button and drag and drop to the audio or video track.
Note that if you use the range marker first, this will only apply to the portion of the clip you marked out.
Once you start inserting clips to the timeline, the Viewer panel will start showing output. See below:
In its most basic form, video editing is all about cutting clips from a video or multiple videos and joining them together to create a more interesting, coherent, and informative video.
The Filmora Pro comes with lots of tools to unlock your creativity. The Slip Tool makes editing faster as you can slip to exactly the portion of the video you want without having to cut and paste from the original clip again.
When you are done with the video, you can add text with animations to portions of the video. Filmora Pro comes with loads of powerful features to enable sophisticated animation. One of the central features is keyframes.
Keyframes are just as the names implies Key Frames in an animation. They are more or less like reference points that anchor the direction of an object in an animation.
Filmora Pro also comes with tools to enable you smoothen out the motion in order to make it look more natural.
When you are done creating your masterpiece, click on the Export button on the top right corner of the Editor Panel.
You will need to login with your Wondershare ID to continue. While you have access to the full Filmora Pro editing capability free, the final output video will have a Filmora Pro watermark. See below.
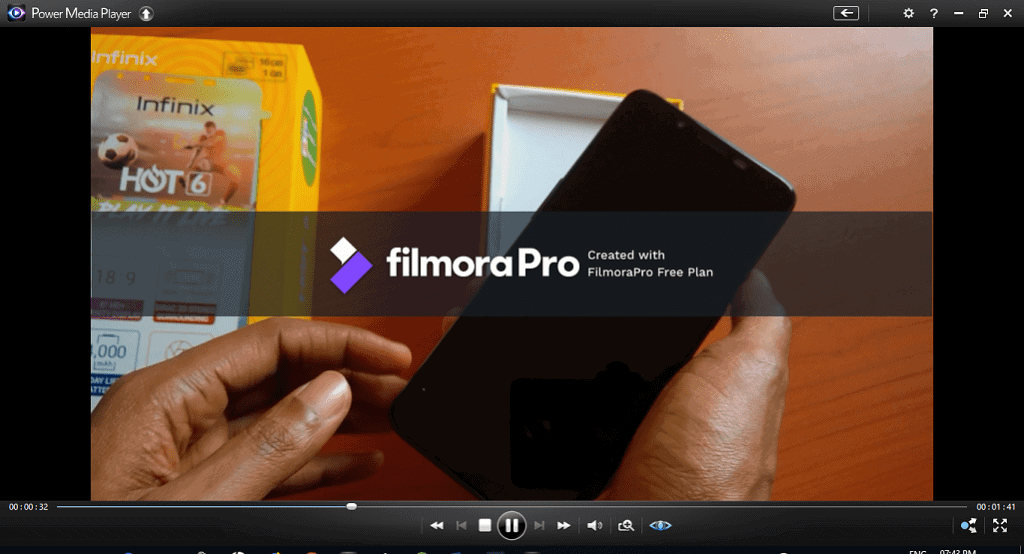
The audio is also scrambled.
To remove this limitation buy Filmora Pro one year license for $89.99 or the lifetime license for $149.99. For latest prices and plans, Click Here.
Checkout the Best Video Editing Software.
Conclusion
Filmora Pro is a powerful video editor for professionals. With more advanced features, the Filmora Pro enables you tap into capabilities far beyond what the Filmora9 can offer.
It supports 4K videos with GPU based rendering, which makes production faster.
You do not need to pay to start using the Filmora Pro as the full capability is completely free. You only need to pay when you want to remove the watermark in the final production.
This means you can download Filmora Pro free right away and start practicing and when you have built-up your skill and created a video you want to share with the world, you can pay for one of the affordable licenses.


